More homeowners across the United States are choosing to embrace clean energy to lower their utility bills. Transitioning to renewable power is an exciting step toward sustainability. However, your home requires a solid foundation before you begin this journey.
Evaluating the current state of your structure is a vital step in the process. You must ensure your house can support the weight and longevity of new equipment. Ignoring the condition of your shingles or decking often leads to costly repairs later.
Taking the time to inspect your home ensures a safe and efficient transition. By prioritizing maintenance now, you protect your investment for years to come. Proper preparation remains the secret to a successful energy upgrade.
Key Takeaways
- Assess your home’s structural integrity before starting any installation.
- Ensure your shingles are in good condition to avoid future maintenance costs.
- Understand that a healthy base is essential for long-term energy efficiency.
- Consult with professionals to verify if your house meets current safety standards.
- Prioritize necessary repairs to protect your renewable energy investment.
The Synergy Between Roofing and Solar Energy
Integrating a solar energy system into your home starts with understanding the vital link between your roof and power generation. Your roof is not just a protective barrier against the elements; it acts as the essential platform for capturing sunlight. When these two components work in harmony, you maximize the efficiency of your home’s renewable power potential.
Recent initiatives and investments from the Department of Energy have significantly lowered the barriers to entry for many Americans. These programs have made high-quality technology more accessible, allowing the average homeowner to transition to clean power with greater ease. As a result, more households are viewing their roof as a strategic asset rather than a passive structural element.
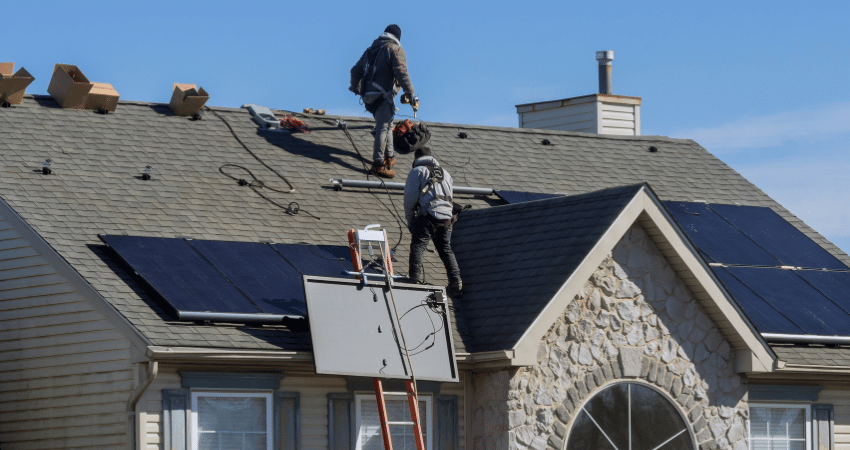
A well-planned installation creates a powerful synergy that benefits both your energy production and your home’s structural health. By choosing the right mounting hardware and layout, you ensure that your solar energy system operates at peak performance without compromising the integrity of your shingles or underlayment. This balanced approach protects your investment while lowering your monthly utility bills.
Ultimately, the goal is to create a durable system that serves your needs for decades. When your roof is properly prepared, it provides a stable base that supports the weight and wind resistance requirements of your solar energy system. This thoughtful integration ensures that your home remains safe, efficient, and ready for the future of sustainable living.
Assessing Your Roof’s Structural Integrity
Evaluating your roof structural integrity is the most critical step before starting a solar project. Solar panels add significant weight to your home, and your existing rafters must be capable of supporting this load over the long term. Taking the time to verify your roof’s condition now prevents costly repairs or system failures later.
Identifying Signs of Structural Fatigue
You should perform a visual check of your attic and roofline to spot potential issues. Look for visible sagging or bowing in the roof deck, which often indicates that the support beams are struggling under the current weight. Water stains on the underside of the roof deck are another red flag, as they suggest rot or moisture damage that weakens the wood.

Check for cracked or split rafters in your attic space. If you notice any of these signs, your roof structural integrity may be compromised. Addressing these problems before mounting solar hardware is essential to ensure the safety of your home and the longevity of your investment.
Professional Inspection Requirements
While a visual check is a good start, it cannot replace a formal assessment by a licensed professional. A structural engineer or a certified roofing contractor can perform a load-bearing analysis to confirm your roof can handle the added stress of solar equipment. They will evaluate the condition of your trusses, rafters, and decking materials to ensure they meet local building codes.
Professional inspectors also check for hidden issues that are not visible from the ground. They provide a detailed report that gives you peace of mind before you sign any installation contracts. Investing in this expert evaluation is a necessary step to protect your property and ensure your solar array remains secure for decades.
Roofing with solar panels: Material Compatibility
Your roof’s surface material dictates how effectively you can secure solar mounting systems for long-term performance. Selecting the right hardware depends heavily on the structural composition of your home’s exterior. Understanding these interactions ensures that your investment remains secure against wind, rain, and thermal expansion.
Asphalt Shingles and Solar Mounting Systems
Asphalt shingles are the most common residential roofing material in the United States. They provide a relatively straightforward surface for installers to work with when using standard solar mounting systems. Professionals typically use specialized flashing to maintain a watertight seal around the roof penetrations.
While these shingles are cost-effective, they often have a shorter lifespan than the solar panels themselves. You should consider the remaining age of your shingles before proceeding with an installation. Replacing an aging roof after panels are already mounted can lead to significant additional labor costs.
Metal Roofing Advantages for Solar Installations
Metal roofing is widely considered the gold standard for solar energy projects. Standing seam metal roofs allow for non-penetrating clamps, which attach directly to the raised seams of the panels. This design eliminates the need for drilling holes, significantly reducing the risk of future leaks.
The durability of metal also matches the long-term performance of modern solar technology. Because both components are built to last for decades, you rarely need to worry about removing the array for roof repairs. This synergy makes metal an ideal choice for homeowners looking to maximize their long-term return on investment.
Challenges with Clay and Slate Tiles
Installing solar arrays on clay or slate tiles presents unique technical hurdles due to the brittle nature of these materials. These tiles can easily crack under the weight of a technician or during the drilling process. Specialized mounting hardware is required to prevent damage to the underlying structure.
Because of the high risk of breakage, many contractors require extra time and specialized training for these projects. This often results in higher installation costs compared to other materials. You must ensure your installer has specific experience working with these delicate surfaces to avoid costly repairs.
| Roof Material | Installation Complexity | Leak Risk | Durability |
|---|---|---|---|
| Asphalt Shingles | Low | Moderate | Average |
| Metal Roofing | Very Low | Minimal | Excellent |
| Clay/Slate Tiles | High | High | High |
Evaluating Roof Age and Remaining Lifespan
Assessing your roof lifespan is a critical step that often determines the long-term success of your solar investment. Solar panels are designed to last for twenty-five years or more, which exceeds the typical duration of many roofing materials. If your current roof is nearing the end of its functional life, installing a solar array now could lead to expensive complications later.
You should carefully inspect your existing surface to determine if it can support the weight and longevity of a new system. For homes featuring asphalt shingles, checking for granule loss, curling, or brittle edges is essential. A proactive approach ensures that your home remains protected while you generate clean energy.
The Cost-Benefit Analysis of Replacing Before Installing
The primary financial risk involves the potential need to remove and reinstall your solar panels to perform a roof replacement. This process requires specialized labor and can cost thousands of dollars in additional fees. By conducting a thorough cost-benefit analysis, you can determine if a new roof is a wise investment before the solar installation begins.
Consider the following factors when deciding whether to replace your roof now or wait:
- The remaining years of service life for your current roofing material.
- The total cost of labor for removing and reinstalling solar panels in the future.
- The potential for bundled discounts when hiring a contractor for both projects.
| Roof Condition | Recommended Action | Financial Impact |
|---|---|---|
| Excellent (15+ years left) | Install solar panels immediately | Low initial cost |
| Fair (5-10 years left) | Consider roof replacement | Moderate upfront, high long-term savings |
| Poor (0-5 years left) | Mandatory roof replacement | Avoids future removal fees |
Synchronizing Solar Installation with Roof Replacement
Synchronizing these two major home improvements offers significant logistical advantages. When you coordinate your roof replacement with the solar setup, you streamline the construction process and minimize disruption to your household. Contractors can often work in tandem to ensure that mounting hardware is integrated correctly with the new roofing materials.
This integrated approach allows for better waterproofing and structural integrity. You avoid the risk of damaging new shingles during a later solar installation. Ultimately, planning these projects together protects your home and maximizes the efficiency of your renewable energy system.
Optimal Roof Orientation and Pitch for Solar Efficiency
Maximizing your solar energy production starts with understanding how your roof’s geometry interacts with the sun. The physical orientation and slope of your roof dictate how much sunlight your panels capture throughout the day. By optimizing these variables, you can significantly improve the overall energy efficiency of your home solar system.
How Angle Affects Energy Production
In the United States, a south-facing roof is generally considered the gold standard for solar installations. This orientation allows panels to receive consistent sunlight during the peak hours of the day. However, the pitch or tilt of your roof also plays a major role in how effectively your system converts light into electricity.
The ideal tilt often matches your local latitude to ensure the sun hits the panels at a perpendicular angle. You should also consider the solar reflectivity of your roofing materials, as lighter-colored surfaces can bounce light back toward the panels, potentially increasing output. Balancing these factors ensures that your system maintains high energy efficiency even during seasonal changes.
Managing Shading Issues from Roof Features
Shading is the primary enemy of solar performance, as even a small amount of shade can drastically reduce power output. Before installing your array, you must identify potential obstructions that could cast shadows across your panels. Common culprits include chimneys, plumbing vents, and nearby trees that grow over time.
To ensure your system operates at its best, consider the following factors that contribute to shading:
- Proximity of tall trees or neighboring structures that block direct sunlight.
- Placement of roof vents and chimneys that create moving shadows throughout the day.
- The impact of solar reflectivity from nearby surfaces, which can sometimes create glare or heat spots.
- Seasonal changes in the sun’s path that may cause new shadows to appear in winter months.
If you find that your roof has significant shading, you might need to adjust the layout of your panels or use microinverters to mitigate the impact. Addressing these physical constraints early in the planning process will protect your investment and ensure long-term energy efficiency for your household.
Managing Roof Penetrations and Leak Prevention
Every mounting point on your roof acts as a potential entry for moisture if not sealed correctly. When you install solar panels, technicians must drill into your roof structure to secure the racking system. This process creates small holes that require professional-grade protection to maintain your home’s weatherproofing.
Standard Flashing Techniques for Solar Mounts
Professional installers typically use specialized flashing kits to protect the areas where mounts penetrate the roof deck. These kits usually consist of a metal plate that slides under the existing shingles to divert water away from the bolt hole. High-quality sealants are then applied beneath the flashing to create a watertight bond with the roof surface.
The goal is to ensure that water flows over the flashing rather than pooling around the mount. By layering the flashing correctly under the shingles, installers mimic the natural shedding process of your roof. This method provides a reliable defense against rain and snow infiltration.
Advanced Waterproofing Solutions
Beyond standard flashing, many modern installations utilize advanced waterproofing components to provide extra security. EPDM rubber gaskets are frequently placed between the mount and the roof deck to compress and create a tight seal. These materials are designed to withstand extreme temperature fluctuations without cracking or losing their elasticity.
Some installers also use secondary barriers or specialized roofing cement for added protection in high-precipitation areas. These solutions offer peace of mind by creating multiple layers of defense against potential leaks. You should always ask your contractor about the specific waterproofing products they include in their installation package.
Preventing Moisture Accumulation Under Panels
Trapped moisture can lead to mold growth or premature degradation of your roofing materials. Proper airflow is essential to allow the space beneath your solar panels to dry out after rain or humidity. Maintaining a consistent gap between the panels and the roof surface helps facilitate this necessary ventilation.
You can take several steps to ensure your roof stays dry and healthy after the installation is complete:
- Schedule annual inspections to check for debris buildup under the panels.
- Ensure that no tree branches or leaves are blocking the airflow paths.
- Verify that the mounting hardware remains tight and the seals are intact.
- Clear away any organic matter that might hold moisture against the roof surface.
The Impact of Solar Panels on Roof Ventilation
Many homeowners overlook how solar arrays influence the natural ventilation of their attic space. When you cover a significant portion of your roof with panels, you create a new layer that alters how air moves across the surface. Ensuring proper roof ventilation remains a priority to protect your home from long-term damage.
Maintaining Airflow to Prevent Heat Buildup
Solar panels naturally absorb heat, which can create a thermal blanket over your shingles. If the mounting system sits too flush against the roof, this heat becomes trapped, potentially raising the temperature of your attic. You should ensure that your installer uses mounting hardware that provides at least four to six inches of clearance.
This gap allows for a convective current to form, pulling cool air from the eaves and pushing hot air out through the ridge. By maintaining this space, you prevent the solar array from acting as a heat sink. Proper roof ventilation is the key to keeping your cooling costs low during the summer months.
Avoiding Attic Moisture Issues
Attic moisture often stems from poor air circulation, which can lead to mold growth and wood rot. When panels are installed, they must not block existing intake or exhaust vents, such as soffit or ridge vents. If these pathways are obstructed, humid air becomes trapped inside your home.
Regular inspections help confirm that your solar setup does not interfere with these critical exit points. If you notice signs of dampness or musty odors after installation, consult a professional to adjust the panel layout. Keeping your ventilation system clear ensures that moisture escapes before it can compromise your insulation or structural rafters.
| Ventilation Type | Function | Solar Impact |
|---|---|---|
| Soffit Vents | Intake of cool air | Minimal if not blocked |
| Ridge Vents | Exhaust of hot air | High if covered by panels |
| Gable Vents | Cross-ventilation | Low impact on airflow |
Weight Distribution and Load-Bearing Requirements
Protecting your roof structural integrity is the most important step when planning a new solar energy system. While solar panels are relatively lightweight, they add a permanent load that your home must support for decades. Proper planning ensures that your rafters and trusses remain in excellent condition throughout the life of the system.
Calculating Dead Loads and Live Loads
To determine if your home is ready for solar, you must understand the difference between dead and live loads. A dead load refers to the constant weight of the structure itself, including the roofing materials and the solar array. In contrast, a live load accounts for temporary forces like heavy snow, wind, or maintenance workers walking on the roof.
Engineers use these figures to calculate the total load-bearing capacity of your roof. If the combined weight exceeds the original design limits of your home, you may face sagging or structural failure. Always consult with a licensed professional to perform a load analysis before finalizing your installation plans.
Reinforcement Options for Older Roof Structures
Older homes often feature rafters that were not designed to carry the extra weight of modern solar technology. If your inspection reveals that your roof structural integrity is compromised, you have several options for reinforcement. Contractors can often install additional bracing or sistered rafters to distribute the weight more effectively across the load-bearing walls.
In some cases, upgrading the decking or adding steel supports can provide the necessary strength to handle the solar array. These modifications might increase the initial project cost, but they provide peace of mind and protect your investment. By addressing these needs early, you ensure that your home maintains its full load-bearing capacity for years to come.
Maintenance Strategies for Solar-Equipped Roofs
Once you install solar panels, your approach to roof maintenance must evolve to protect your investment. While solar systems are generally durable, they create new zones on your roof that require specific attention. Consistent care ensures that your energy production remains high while keeping your underlying structure safe from damage.
You should prioritize a proactive roof maintenance schedule to address the unique challenges posed by solar arrays. Whether you have asphalt shingles or durable metal roofing, the presence of panels can trap moisture and organic matter if left unchecked. Regular oversight helps you catch minor issues before they turn into costly repairs.
Routine Cleaning and Debris Removal
Debris such as leaves, twigs, and pine needles often accumulates in the gaps between your panels and the roof surface. This buildup can block airflow and trap moisture, which is particularly problematic for certain types of metal roofing. You should clear this debris at least twice a year to prevent rot or corrosion.
When cleaning your panels, follow these best practices to ensure safety and efficiency:
- Use a soft-bristled brush or a microfiber cloth to avoid scratching the glass.
- Avoid using harsh chemicals or abrasive soaps that could damage the panel coating.
- Clean your panels during the early morning or late evening to prevent thermal shock from cold water on hot glass.
- Check for any signs of bird nests or pest activity that might have started under the array.
Inspecting Mounts and Seals Over Time
The mounting hardware is the most critical point of contact between your solar system and your home. Over time, the expansion and contraction caused by temperature changes can loosen these connections. You must inspect these mounts periodically to ensure they remain tight and secure.
Pay close attention to the flashing and seals around each mounting point. If you notice any cracks or gaps in the sealant, address them immediately to prevent water infiltration. Keeping these seals intact is essential for maintaining the long-term health of your roof and preventing leaks that could compromise your home’s interior.
Insurance and Warranty Implications
Navigating the intersection of roofing guarantees and energy upgrades is a critical step for every homeowner. Protecting your financial investment involves more than just choosing high-quality panels; it requires a clear understanding of how your existing home protection plans interact with new equipment. By coordinating closely with your contractors, you can ensure that your long-term property value remains secure.
Protecting Your Roof Warranty During Installation
Before any work begins, you must verify the terms of your current roofing contract. Many manufacturers have specific clauses regarding modifications, and improper installation can void your coverage. Always ask your solar provider if they are certified by your roof manufacturer to perform penetrations without compromising your existing solar warranties.
Documentation is your best defense against future disputes. Keep a detailed record of all installation steps, including photos of the mounting process and the sealing techniques used by the crew. If your installer provides their own workmanship guarantee, ensure it explicitly covers any potential leaks caused by the solar mounts.
Updating Homeowners Insurance for Solar Assets
Once your system is operational, you must contact your insurance provider immediately. Adding a solar array significantly increases the replacement value of your home, which may require an adjustment to your policy limits. Failing to report these upgrades could leave you underinsured in the event of a claim involving your roof or the panels themselves.
Most insurance companies view solar panels as a permanent fixture of the home. You should confirm that your policy covers damage from common perils like wind, hail, or fire. While many standard policies include these assets, some may require a specific rider or endorsement to provide full protection for your investment and the associated solar warranties.
Preparing Your Roof for Future Solar Upgrades
You can maximize your long-term energy savings by preparing your roof for future solar expansions today. Many homeowners start with a modest array, only to realize later that their energy needs have grown. By anticipating these changes now, you avoid costly retrofits and ensure your home remains energy-efficient for years to come.
Future-Proofing Your Electrical Infrastructure
Your electrical panel and wiring serve as the backbone of your solar energy system. When you install your initial panels, consider upgrading to a larger inverter or a hybrid model that supports battery storage. This proactive step allows you to integrate home batteries or additional solar modules without needing a complete system overhaul.
Consult with your installer about the capacity of your current electrical service. Ensuring your main panel has enough breaker space for future expansion saves you significant labor costs later. A well-planned electrical foundation makes scaling your system a simple plug-and-play experience.
Selecting Modular Mounting Systems
The hardware you choose for your roof plays a critical role in how easily you can add more panels. Selecting high-quality modular solar mounting systems provides the flexibility needed to expand your array across different roof sections. These systems are designed to be compatible with various panel sizes and configurations, making them a smart investment for growing households.
Modular designs allow for incremental growth, meaning you can add panels as your budget permits. By choosing versatile solar mounting systems, you ensure that your roof remains structurally sound and aesthetically consistent as your energy production increases. Review the following table to understand the benefits of choosing modular hardware over fixed alternatives.
| Feature | Fixed Mounting | Modular Mounting Systems |
|---|---|---|
| Scalability | Limited | High |
| Installation Speed | Fast | Moderate |
| Future Flexibility | Low | Excellent |
| Cost Efficiency | Lower Initial | Higher Long-term Value |
Conclusion
Investing in solar power transforms your property into a modern energy hub. You must view your house as a complete system where every component works in harmony to produce power.
A strategic roof replacement serves as the foundation for your solar array. Aligning your installation with the remaining roof lifespan prevents costly removal and reinstallation fees later. This proactive approach protects your investment while ensuring your home remains weather-tight for decades.
Maximizing your energy efficiency requires careful planning and expert guidance. You should partner with certified contractors who understand the specific needs of solar-ready roofing systems. These professionals help you navigate technical requirements to ensure your setup performs at its peak.
Take the time to evaluate your current roofing materials and structural capacity today. Your commitment to quality now leads to better performance and lower utility bills over time. Reach out to local solar installers or roofing specialists to start your transition toward sustainable living.
FAQ
Why is it critical to evaluate my roof’s condition before transitioning to solar energy?
Your roof serves as the structural foundation for your entire solar array. Evaluating its condition ensures that your home can safely support the equipment for its 25-year lifespan. As the Department of Energy emphasizes, a healthy roof is essential to maximizing the return on your investment and preventing costly repairs shortly after installation.
How can I determine if my roof’s structural integrity is sufficient for solar panels?
You should look for visible signs of fatigue such as sagging rooflines, cracked rafters, or evidence of internal moisture damage in your attic. Because solar equipment adds significant weight, hiring a professional inspector is a necessary step to verify that your home’s frame can handle the additional load without compromising safety.
Which roofing materials are the most compatible with modern solar mounting systems?
Asphalt shingles from manufacturers like GAF are highly compatible and common, though standing seam metal roofs are often considered the gold standard because they allow for mounting without roof penetrations. Brittle materials like clay or slate tiles present unique challenges and require specialized mounting hardware to prevent cracking during and after installation.
Is it financially beneficial to replace my roof at the same time I install solar panels?
Yes, if your roof is nearing the end of its lifespan, synchronizing these projects is a smart financial move. Replacing the roof beforehand prevents you from having to pay thousands of dollars later to have the solar panels removed and reinstalled when the roof finally fails. This proactive approach streamlines labor and logistics costs.
How do roof pitch and orientation affect the energy production of my solar system?
The angle and direction of your roof dictate how much direct sunlight your panels capture throughout the day. While south-facing roofs typically offer the best performance in the United States, your installer will also need to manage shading issues caused by chimneys, vents, or nearby trees to ensure your system operates at peak efficiency.
What measures are taken to prevent roof leaks during the solar installation process?
Professional installers use specialized flashing techniques at every point where the roof is penetrated. Brands like IronRidge and QuickMount provide high-quality sealing solutions designed to create a watertight barrier. Additionally, maintaining proper airflow under the panels prevents moisture from becoming trapped against your roofing material.
Will solar panels cause my attic to overheat or create moisture problems?
When installed correctly with an adequate air gap, solar panels can actually shade your roof and reduce attic temperatures. However, it is vital to ensure the array does not block existing ridge vents or soffits. Maintaining this natural ventilation pattern is key to protecting your home’s insulation and structural components from heat and humidity.
How do I calculate the weight distribution and load-bearing requirements for my roof?
Engineering a solar array requires balancing the “dead load”—the permanent weight of the panels and racking—with “live loads” like wind and snow. Older homes may require structural reinforcement to distribute this weight evenly across the frame. A professional structural analysis will determine if your specific roof design meets modern safety codes for solar loads.
What maintenance is required for a roof that is covered by solar panels?
You should perform routine inspections to clear leaves and debris that may accumulate under the panels, as these can trap moisture. It is also important to periodically check the integrity of the mounting hardware and seals. While the panels themselves are durable, keeping them clean ensures they continue to produce energy at the highest possible rate.
How can I ensure my roof warranty and homeowners insurance remain valid after installation?
Before work begins, you must coordinate with your roofing contractor to ensure the solar installation doesn’t void your existing warranty. Once the system is active, contact your insurance provider, such as State Farm or Liberty Mutual, to update your policy. This ensures your new solar assets are fully covered against weather events or accidental damage.
How can I future-proof my roof for upcoming solar technology and battery storage?
Preparing for the future involves choosing modular mounting systems that can be easily expanded. You should also consider upgrading your electrical infrastructure now to accommodate future additions like a Tesla Powerwall or Enphase battery system. This foresight allows you to scale your renewable energy production as your family’s power needs grow.